Table of Contents
Linux Live USB Creator-Install Kali Linux Using USB
Today in this article i’m going to so you how to use Linux Live USB Creator-Install Kali Linux Using USB.Linux live USB creator is free as we all know Linux is open source as well so tools are freeware. Hey guys hax here again, today in this article I’m gonna teach you how to install kali Linux on USB flash drive! So let’s begin with this tutorial it’s very easy to install kali Linux on USB flash drive using Linux live USB creator.
Requirements:
- At least 8 gigabytes of USB flash drive.
- The latest version of kali Linux.
- Linux live USB creator or Rufus (In this article we will use Rufus).
- Your computer with windows running
So, if you guys have above requirement then we are ready to move on!
If you love to install kali Linux on the virtual box then please take a look back of my previous tutorial.
Plug in your flash drive:
Alright, so the first thing is you want to grab your flash drive and plug into your computer also make sure that you’re on windows operating system guys. Now sit back and relax and follow my steps. Note: Your flash drive must be 4 to 8-gigabyte at-least.
Linux Live USB Creator
It’s very easy to download Linux live USB creator, but in this tutorial, we will use Rufus! Ok, what is the Rufus? Rufus is native Linux live USB creator which can make your flash drive bootable. With Rufus, you can make any iso file as bootable! Because it’s made for making bootable USB even it is light weight and it’s less in size.Now you can download Rufus from its official website, it’s completely free guys, Download here Rufus!
Okay once you download Rufus you will have an executable file in download folder. That means you can directly start the program. Now plugin USB flash drive and then run Rufus.
Downloading
You guys can download Linux from its official website kali.org! I highly recommend you to take the latest version of operating system through there.
Creating live boot kali Linux USB Drive:
Now as you open the Rufus you can see that disc shape icon right.You need to click on that and then it will ask you to input iso or kali Linux file. Now you need to find kali Linux iso you can check on where you have downloaded. Now after you select your kali linux.iso file you can click on start.
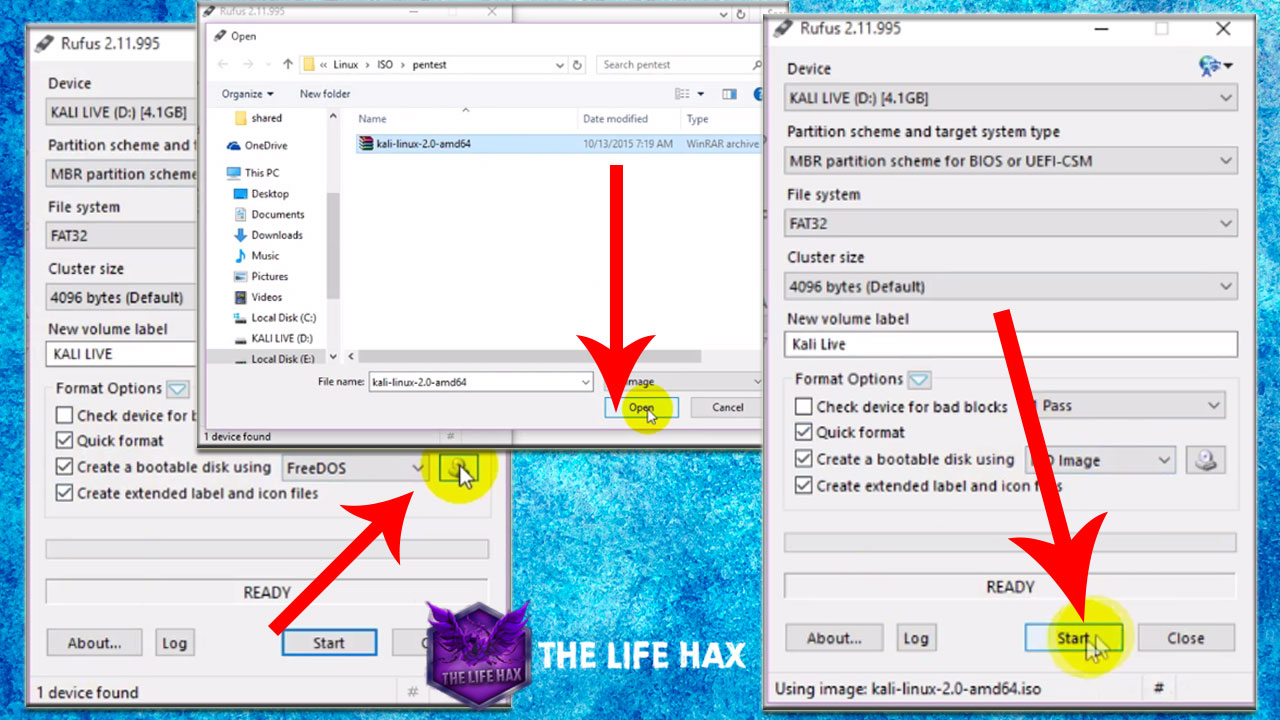
Okay, guys now your flash drive will be bootable within 5 minutes. Till then take coffee and sit back relax. Once it finishes it will stop itself.
Now once your flash drive is bootable then you can boot kali Linux live through it easily.
How to live booting kali Linux?
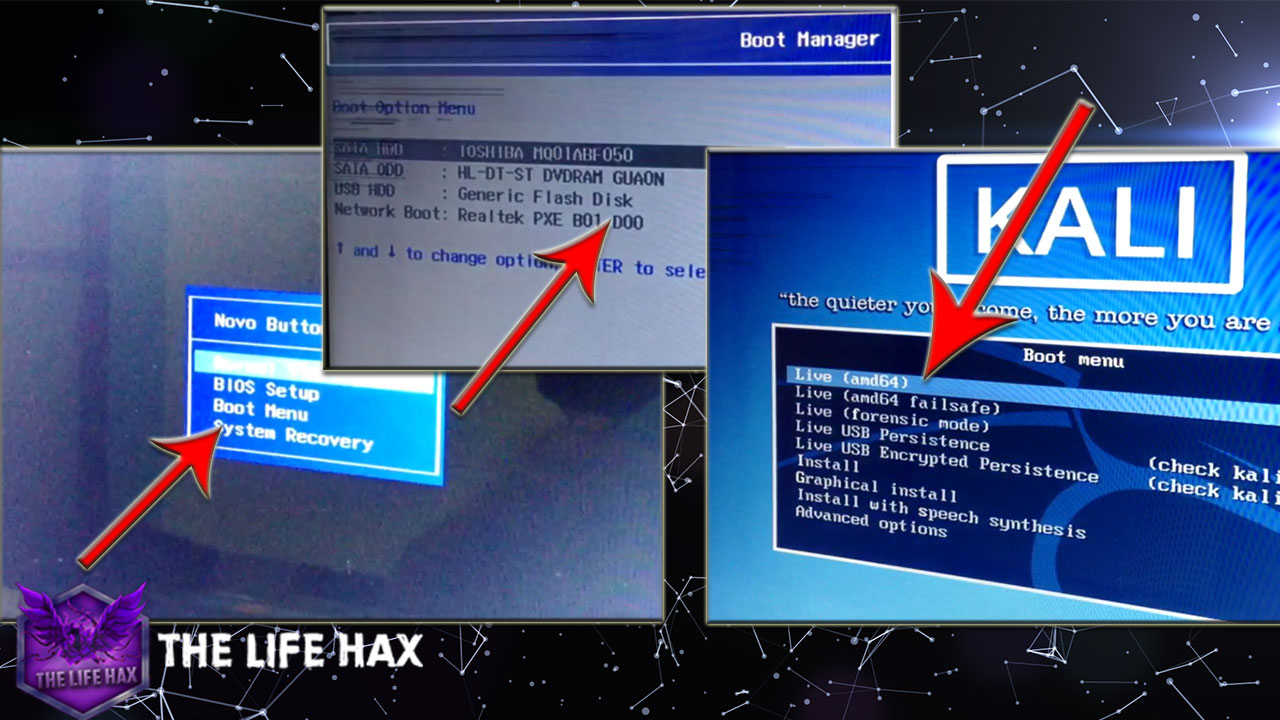
Alright, floks congratulations first that you have successfully created live bootable USB! Now you might question how do i boot live into kali Linux through my USB. Actually its very easy to do, but if you guys do have laptop or desktop that might be a little bit tricky. You need to go first at bios setting. Now the different computer has different way to go on bios setting. So i highly recommend you guys to research if my following process is not working.But as a basically lot of computer people use key like del and function keys. So you can also try on startup. Try on startup press del, if it don’t work press f12 or f11. so once it goes on bios change boot option to USB and save it and restart it now you can boot live kali Linux.
Enjoy!
Note: if you log out on the live session you should login username as root and password toor!
Thank you for reading the post! Thank you so much
Want the video tutorial then check out:
Subscribe:https://goo.gl/mtP8iJ
